Below is a selection of questions that users frequently ask along
with their answers. Naturally, if you don't find what you're looking
for here, or if any recommendations in the answers don't work for
you, please don't hesitate to contact our support staff via
support@driftnoise.com.
No worries! Just send an email to
support@driftnoise.com, and we will send you your token.
Within the IcySea App click on the "i" button (in the
upper left corner), scroll down to the bottom of the
window and select "Check for update". If there is a new
update available close the "i" window and click on the
"Update" button on the left side of your screen. Be
aware that the IcySea download will use up about 80
Megabyte, so make sure you have a stable internet
connection capable of facilitating such a data volume.
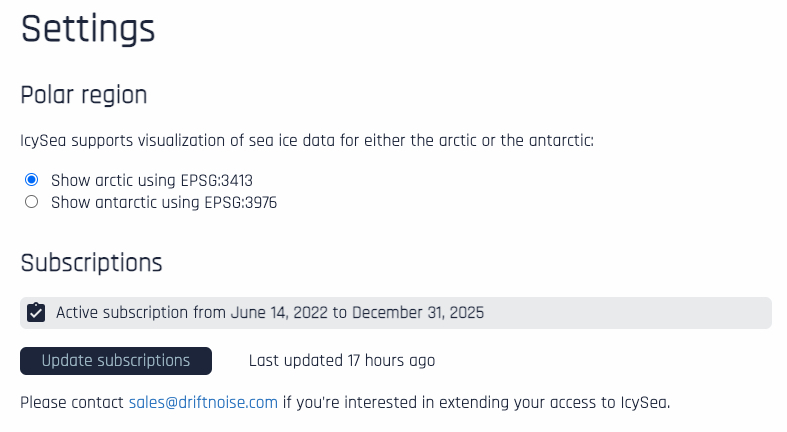
Within the IcySea App click on "Settings" (The wheel
icon in the upper left corner) and then click on "Update
subscriptions". Your new subscription period should be
displayed now.
Within the IcySea App click on "Settings" (The wheel
icon in the upper left corner) and then click on "Update
subscriptions". If your region of interest is still not
available, please
contact our support team.
Go to the 'Settings' menu and select whether you
want to use your device's
Location Services or an
external GNSS sensor to display
your user position. There are two ways to display
your current position using an external sensor:
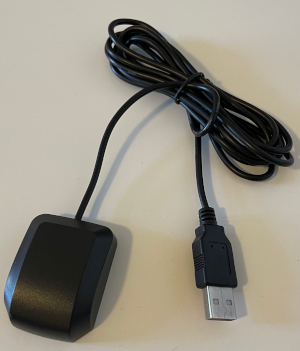
1. Use an external 'GNSS Dongle'
(see picture), which is a plug in sensor for your
computer and costs approx. 15 EUR (we usually use:
'G-MOUSE' from 'DIY Mall'). Connect the sensor via
USB and click on the 'User Position' button in the
top left corner in IcySea. You will be asked which
COM Port sensor you want to use and after selecting
the correct one the sensor will connect and IcySea
will display your position. This method is
applicable for all operating systems (Windows,
Linux, macOS).
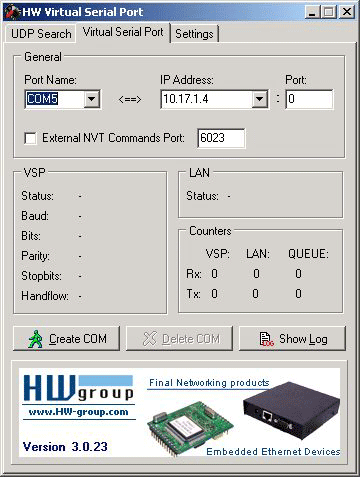
2. Connect IcySea to your ship's GNSS
via a virtual serial port:
i) Install the freely-available software
HW VSP3
(Windows only) on the IcySea computer (admin rights
are required). The software creates a virtual serial
port.
ii) Input the IP address of the server distributing
the GNSS position on the ship into the HW VSP3
software and select the corresponding COM port (see
image).
Screenshot from www.hw-group.com
iii) Go to the IcySea 'Settings' menu (wheel symbol
in the top left corner), navigate to the 'User
Position' menu and select 'Connect to GNSS sensor
via serial port'. Also select the correct baud rate,
which is adjustable within the HW VSP3 settings.
iv) Close the IcySea 'Settings' menu and click on
the 'User Position' button in the top left corner.
IcySea will connect and move the screen to your
current position.
If any of the above instructions are not
working for you, please contact us via
support@driftnoise.com.
Radar images are divided into a grid, where you have to
actively download individual tiles. To do so,
right-click (or long-press on tactile screen) on a tile
and select "Get low-res radar image" or "Get high-res
radar image". Radar images are available everywhere for
all customers.
Interpretation guidelines are provided beside the layer,
click on the information icon:
. If these
guidelines are not sufficient for your operations and
you require more support, we are happy to help! Just
contact our support staff
to get personalised assistance.
All data products are gathered from external
sources. As soon as the respective data set
becomes publicly available it is processed and
displayed in IcySea, which allows you to utilize
near real-time information for your operations.
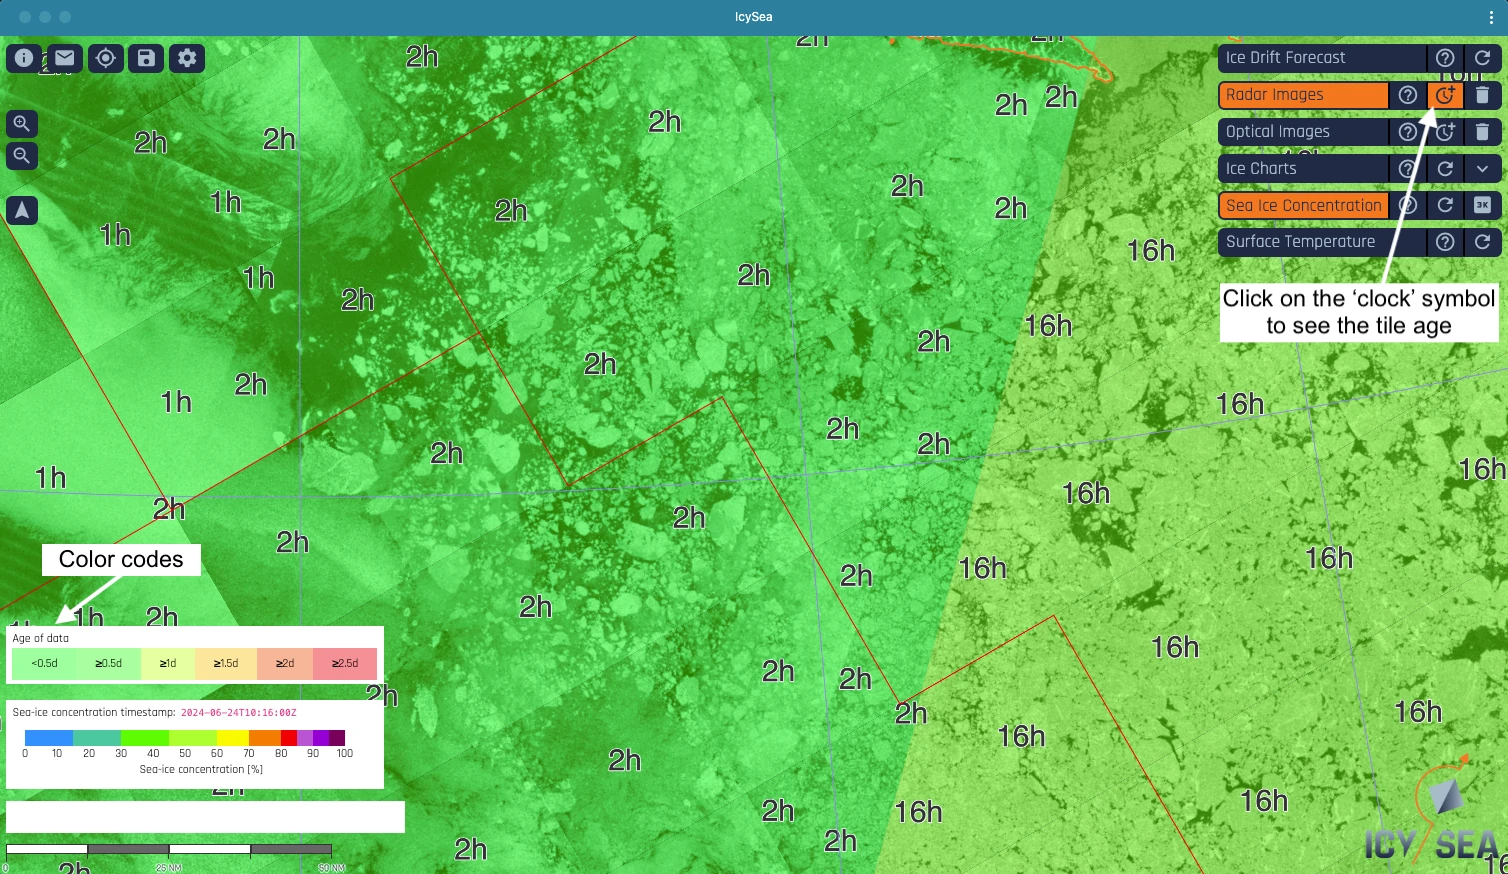
Sea-ice concentration
Activate the layer and a legend at the bottom
left gives additional information including a
timestamp. The sea-ice concentration layer is
updated up to eight times a day, so you should
refresh the layer regularly.
Surface temperature
Click on the layer name in the layer control
panel at the top right hand corner of the app to
activate the layer. You will now see surface
temperature timestamp and colour map information
in the bottom left hand corner of the page.
Surface temperature information is updated daily
at approximately 14:00 UTC.
Ice drift forecast
Activate the layer and a legend at the bottom
left gives additional information including when
the forecast was calculated. The ice drift
forecasts are updated once per day.
Ice charts
Activate the ice charts layer and the
corresponding legend in the bottom left corner
will provide the date and timestamp. When
clicking on the ice chart polygons of the DMI
ice charts the egg code box will also display
the age information. Data updates depend on
where the data is coming from. DMI updates
usually come in between every one to three days,
while US ice charts are produced on a weekly
basis.
Radar and optical images
On the layer button of radar/optical images
click on the "clock" symbol. All images will be
colour-coded according to age, legend appears at
the bottom left. If you zoom in the tiles of
interest, their exact age of data tiles will
show. See the example below:
IcySea is always global, covering both polar regions. By
default IcySea shows the Arctic; to show the Antarctic
first click on the settings wheel in the upper left
corner of the window to open the "Settings" dialog box.
Then click on "Show antarctic" option from within the
"Polar regions" section and then close the dialog box by
clicking on the X in the top right-hand corner. You
should now see the Antarctic displayed in IcySea.
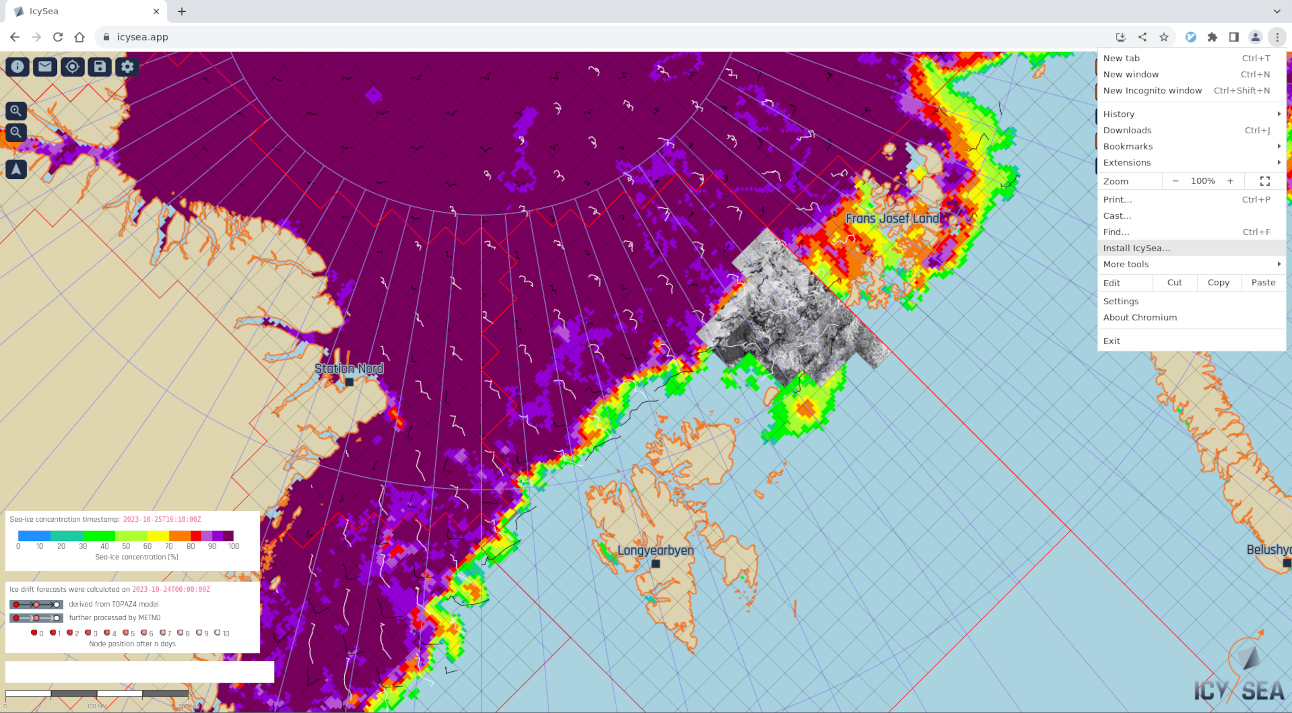
When using Google Chrome, you can click on the three
vertical dots to the right of the Chrome browser bar to
open the dropdown menu. There it says "Install
IcySea...". Once you have done that you have IcySea
available as an App icon on your computer. You won't
have to open IcySea via Chrome anymore (that will happen
automatically once you click on the App icon).